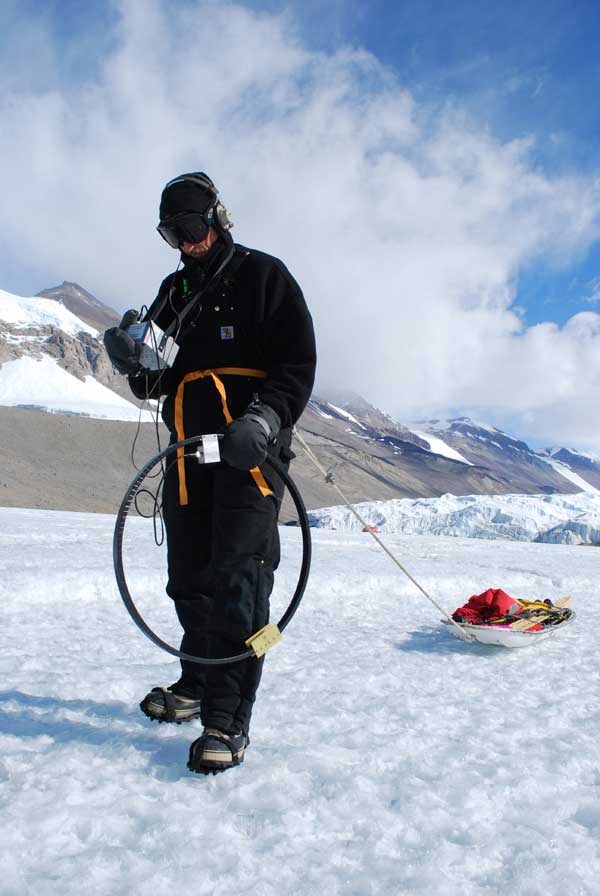
Bill Stone at Bonnie Lake in the Dry Valleys, Antarctica
LOCATING GROUND ZERO
Using the shape of the magnetic field
A printable PDF version of this article is found here.
The procedures described here are for the long range "DQ" receiver and high-power beacons. With the Basic-1 and 2 radiolocators, the physics of locating ground zero remains the same, but some considerations are different.
Radiolocation requires practice. Even though this gear often gives a useable signal close to 1 km away, always try to position yourself as close as possible to the expected location by using topographic overlays, GPS, compass course and distance from an entrance, etc. Try to always be higher than the cave passage, ie wait uphill rather than downhill. If you are within a horizontal distance of about 1.4 times the expected depth of the beacon, the locating will be very easy.
Using the shape of the magnetic field
A printable PDF version of this article is found here.
The procedures described here are for the long range "DQ" receiver and high-power beacons. With the Basic-1 and 2 radiolocators, the physics of locating ground zero remains the same, but some considerations are different.
- The receiver is not as sensitive and therefore will not be bothered as much by atmospheric noise at night. The receiver does not have calibrated dials, alarms, null balance and bandwidth controls, etc to worry about!
- The beacon can be left running for several hours without running the battery down. The underground crew can map or explore instead of waiting around.
- The surface crew may may need to wander around the general area listening for the beacon due to it's short range, instead of sitting in 1 place. The receiver can be turned on early and left on. Using multiple surface receivers is a good option.
- Once you have located the beacon, and the underground crew switches to receive, you can let them know that you have succeeded, by using simple prearranged codes, and they can let you know if they are going to the next location or exiting the cave. This flexibility is not possible with the 1-way DQ radiolocator without carrying extra downlink communications gear.
Radiolocation requires practice. Even though this gear often gives a useable signal close to 1 km away, always try to position yourself as close as possible to the expected location by using topographic overlays, GPS, compass course and distance from an entrance, etc. Try to always be higher than the cave passage, ie wait uphill rather than downhill. If you are within a horizontal distance of about 1.4 times the expected depth of the beacon, the locating will be very easy.
- The best time of day for radiolocations is during the morning, from about 8AM to 1-2PM. The worst time is during the night when "skip" brings the noise of far distant thunderstorms. This assumes no local storm activity. For this same reason, winter is much quieter than summer. Even so, it is possible to do moderate depths on a summer evening. I find it hard to even get cavers moving before the "crack-of-noon"!
- When the underground party arrives at the location, their job is to locate or create a level spot at the intended Ground Zero location, then position their loop precisely horizontal by using the attached or supplied bubble level or a line level. Eyeballs will not do this job! If the loop is offset from ground zero for practical reasons such as a deep pool or uneven ground, the crew can survey between the 2 spots while they are waiting after turning the beacon on.
- Coordinate times with the underground party so you know the earliest time they will "turn on". In smaller caves or with experienced cavers, you can have them operate on a schedule. At first, plan to have the beacon turned on for 30 minutes or more. With careful planning, I have used a little as 4 minutes with divers in springs. You go to the first location, turn on a little ahead of time, and null the receiver (after disconnecting the loop, set the switch to low gain and the dial below 5.0, or simply turn down the gain on the simplified receiver), then reconnect the loop using quite high RF gain, 1 Hz bandwidth, and the loop on the ground. The alarm works quite well (complete receiver only), although false phase-locks can occur with strong interference from Thunderstorms (atmospheric noise), power lines, or electric fence controllers. Simply reduce the RF gain until there is only an occasional false alarm. Don't wait directly under a noisy power line or close to a metal fence line!
- When the beacon is heard, hold the loop vertical by its handle and slowly rotate it for a null, adjusting volume as desired. RF gain should remain high enough to give deep nulls. Ground Zero lies along the null line, which is known at a Line Of Position, or LOP. See the above sketch showing several lines of position passing thru ground zero. Gamblers can simply walk in one direction along the null line while continually swinging the loop thru the null to update direction. If the signal gets weaker, then simply turn around and walk back the other way. In an open field, one can walk perpendicular to the original null line a short distance and then null again. If you walked far enough, the two null lines (LOPs) will not be parallel and will intersect near Ground Zero. This is the 2-LOP method. If all else fails, you may be very far from the Beacon. In this case make a quick signal strength measurement with the loop on the ground (complete receiver only) then walk 50-100m along the null line and measure again to see of the signal really is getting stronger or weaker. Note that this method may fail if you are within a distance roughly twice the estimated depth of the beacon from Ground Zero, where the field lines are not vertical.
- The above sketch shows a side view of a single line of position. You will be walking towards Ground Zero from the left or right side of the sketch, with the loop oriented for an audio null like the green loops shown.
- It is easy to "overshoot" Ground Zero. As one gets close, within 1.4 times the estimated depth of the beacon, the best way to check progess is to occasionally rotate the vertical loop perpendicular to the null line that you are walking along, then tilt the top of the loop towards yourself. See the blue loop positions in the above sketch. At first this null may occur with the loop nearly horizontal (very confusing), but as Ground Zero is approached, this null will occur with the loop closer and closer to vertical. Very close to ground zero the loop will null while rotated in any direction, but the signal will become incredibly strong when the loop is tilted even slightly from vertical. At this point, for highest accuracy, it is a good idea to re-null the receiver. See the sketch below for the magnetic field shape near ground zero.
- Now the vertical loop is placed on the ground and tilted back and forth to find the null. At any nearby location except exactly at Ground Zero, the magnetic field will tilt towards you as it exits the ground. The cylindrical bubble level shows loop tilt. If the loop nulls when it is tilted slightly towards you, then move the bottom of the loop slightly away from you and re-null, repeating until the loop is precisely vertical when nulled. The plane of the loop is now precisely on a line of position that passes thur Ground Zero. With lots of practice, and quiet conditions, it is possible to detect a 6 inch (10cm) change in the position of a beacon at 300 ft (90m) depth! Mark this line at the loop, then rotate the vertical loop 90 degrees and repeat the process to obtain a second line, which should cross directly over the first line. Mark the intersection of the lines as ground zero. See the blue loop positions at the center of the "overhead" sketch above. To cancel out most of the errors in the receive loop and its level, repeat each measurement in the last step with the vertical loop rotated 180 degrees from its original position. This will usually give slightly different positions. The result will be a small square box with ground zero at the center.
- There are several possible causes of poor nulls, which are nulls that are not deep and sharp. Use the narrow 1 Hz bandwidth mode for the cleanest signal. First, carefully adjust the audio null control on the receiver for minimum audio tone output, with the loop antenna disconnected and the RF gain turned down. If the tone does not totally disappear, try tweaking the internal "null balance" control very very slightly with a screwdriver thru the hole in the side of the case. Readjust the front panel null and repeat. The controls interact.
- Interference from nearby power lines, electric fence controllers, or distant thunderstorms can make the null appear broader because the signal disappears into the interfering noise when you get close to the null.
- Nulls tend to be broad when you are a long way from ground zero, or when the beacon is very deep, say 300 ft or more, or when there is a lot of highly conductive overburden such as deep wet soil, clays, shale, etc.
- The most exotic cause of poor nulls is the limestone itself. The effect is called anisotropy, which is a fancy way of saying that the conductivity of the rock is not the same in all directions, ie is not homogeneous. The assymetry may be explained by parallel sets of vertical fractures in the rock, called "joints". This effect is obversed when doing radiolocations under quiet conditions in deep dry caves and in nearly every location I have done in Florida Springs, where the water saturated limestone is highly conductive, although quite flat lying and uniform with essentially no overburden.
- This anisotropic effect causes null sharpness to vary depending on the direction that you approach ground zero. In fact you will always find one Line Of Position which will always give a perfect deep null. This fact can be used to make the search easier. A line of position at right angles to this best LOP will always result in the broadest, shallowest null. This effect is very noticable at Ground Zero, where different loop directions may have to be chosen to obtain sharper nulls.